WordPress started out as a simple blogging platform before evolving into a complete web building solution. The CMS makes it easy for people to create their desired interfaces with minimum coding or other technical methods. While most of its in-built features are convenient and do not need to be changed, during some situation you may feel the need for a custom-built element. Here we are discussing the method to quickly create a custom login page in WordPress websites. The process is simple and will be suitable for users who do not possess in-depth technical knowledge.
Some readers may feel that changing the default login is unnecessary. However, people who own a membership website, forum, or any other interface that involves user registration will want to make the modification. A personalized login screen with your own logo will be a much better branding tool than the plain old default page.
Let’s now discuss the process to build a custom login page.
1. Install A Form Plugin
Essentially the login page contains a simple form for the purpose. We can acquire a personalized page by replacing the default form with our own custom creation. This objective can be fulfilled by using a form builder plugin. If you visit the official plugin directory, you will find numerous pre-built tools that can be used to create various kinds of forms. The product that we have chosen to create our login form is called Contact Form by WPForms or simply as the WPForms plugin. It is a perfect example of the efficient character of WordPress plugin development. The tool can be downloaded for free but buying a premium plan will be better as it will give you access to numerous extensions.
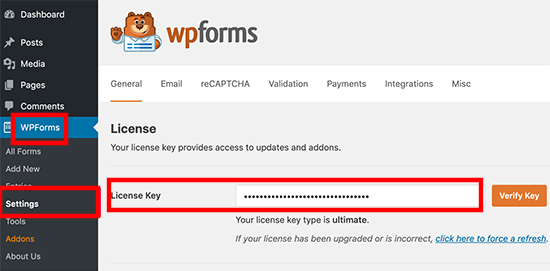
Go to the plugin developer’s website and buy the form builder after choosing a plan. Visit Plugins > Add New and hit the Upload Plugin tab. Now upload the zip file of the tool and do not forget to activate it. After activation, you will see a new option called WPForms is added to your control panel. Locate the Settings option under it and click on it. You will be asked to enter a license key that can be obtained from your WPForms account.
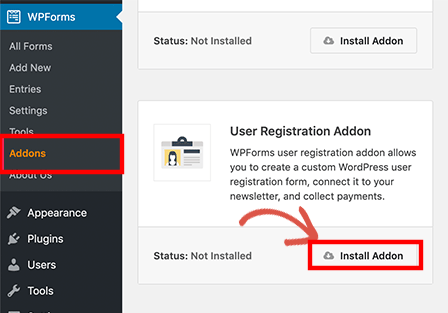
Now go to WPForms > Addons and find the User Registration Addon. Install and activate it on your website and move ahead.
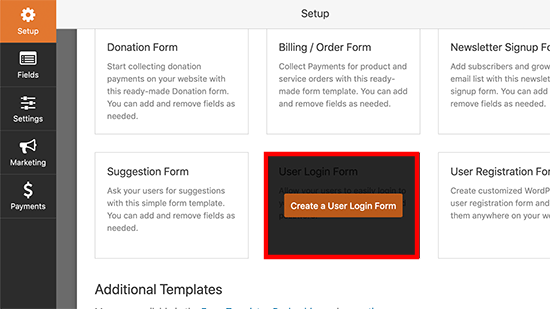
2. Create A Login Form
We will now create a new login form for our website with the freshly-installed tool. Click on the Add New option under WPForms in the dashboard menu. This will launch the builder tool. Locate the User Login Form template on the screen. Press the Create a User Login Form tab.
You will now see a pre-built template of a login form with some basic fields.
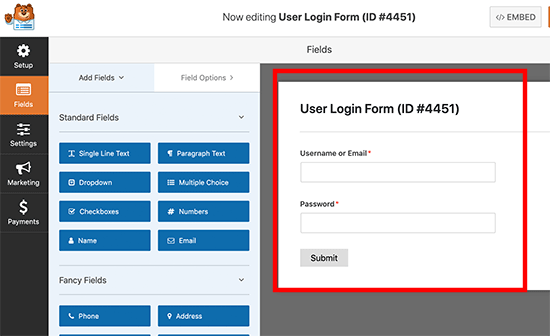
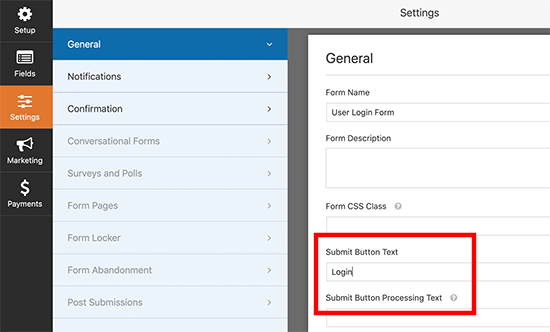
It is natural that you would want to personalize the boxes according to your preferences. You can click on a field to alter its text or description. Move down and you will find the Submit button. Since we are looking to create a custom login page in WordPress websites, we will change the text to Login. Click on the button and you will see the option to modify the Submit Button Text.
3. Configure Some More Form Settings
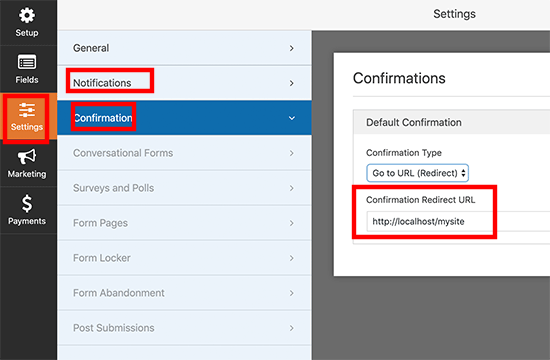
Click on the Settings option in the control panel on the left-hand side. Switch to the Notifications tab to make sure they are turned off. In case, they are enabled, then you will be notified every time someone logs in to the interface. This can be quite irritating. Click to open the Confirmation option. Here you can define what will happen once a user logs in successfully. You can enter the location where the person will be directed to, in the Confirmation Redirect URL field. Preview all the changes and once you are satisfied with them, press the Save tab that is located in the top right-hand side corner of the screen.
4. Add The Form To Your Website
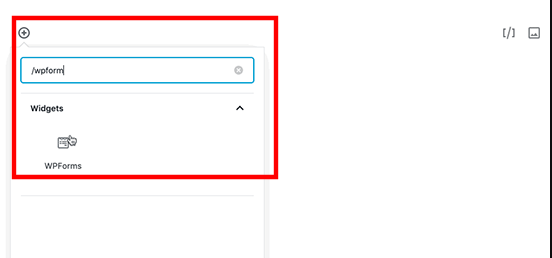
Let us now add the form to our website. Identify the location where you want to implement the new login screen. Then open the post or page in the editor. Click on the “+” icon located in the top left-hand corner of the editor. This will open the menu for adding new blocks. Use the search box to find the WPForms block. Select the block to add it to your editing screen.
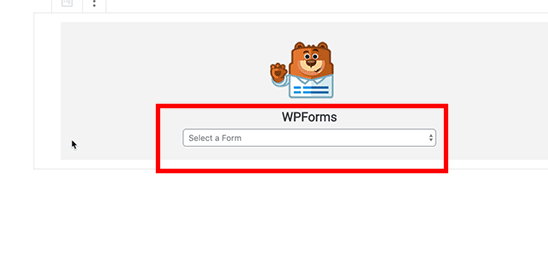
Now use the dropdown to select the form that you created in the previous step.
Check how the form is looking on your page. Then click on the Publish button on top of the editor in the right-hand corner to add it to your website.
Conclusion
Many users convert website to WordPress theme to enjoy the benefits offered by this powerful web building tool. This method to create a custom login form is an example of the convenient nature of WordPress that attracts so many users. It is just one of the many benefits that people access once they get on the platform.